This is great for uploading a batch of participants at the start of a project, participants imported in this way are set as consumers by default.
Watch this short, two minute video for a quick walkthrough on how to add multiple, new users to InsightHub. Written steps and screenshots follow below.
Before uploading any users into the platform, you need to create a CSV file which contains your users, plus any information you want to include on them as part of the user fields (you need to have made sure you have created your user fields (see creating user fields for more information on this).
Email address and at least one name field are essential, any other fields are optional, so in this example, the first 3 columns are essential, the next 6 are optional.

Please note: The maximum number of rows that can be uploaded at one time is 100,000. However, if this file contains optional user field columns (such as gender, age), we would recommend creating smaller batches of 30,000 to avoid extended upload times.
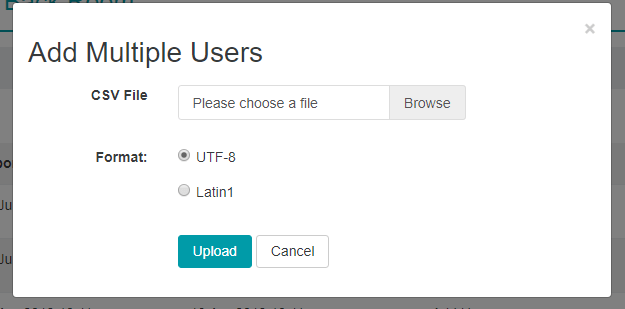
Once your CSV file is ready to upload, go to: Back room > Database > CSV Uploads and then select to 'Add Multiple Users':

Browse to the CSV file you want to upload, select either UTF8 or Latin1 as the upload type (Latin1 works better if there are characters which the system might not recognise, e.g. letters with accents etc.) and then press upload:
You then need to match up the fields in your CSV file with those in the platform, the fields in the drop downs are those in your excel file:
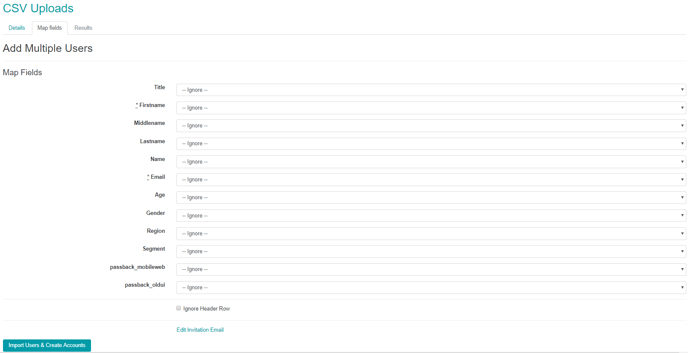
Match up all the relevant fields, if you have a user field but you do not have a field for this in your CSV file, you can leave the row on '-ignore-'.
If you have a header row on your CSV file (having one makes it a lot easier when matching up your data), you need to tick the 'ignore header row' box otherwise the platform will try to import this as a user (and you will end up with a failure).
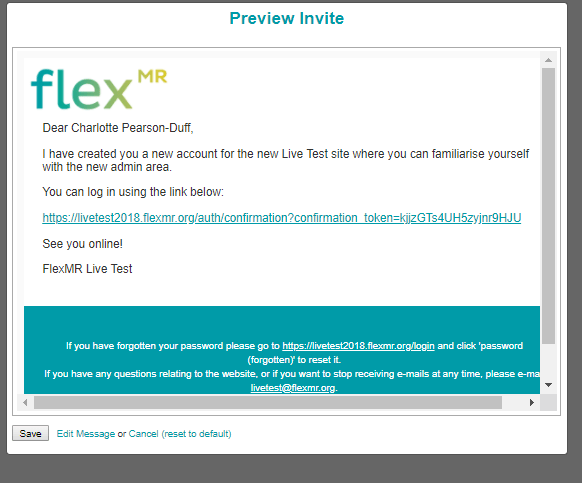
Before uploading your users, should you wish, you can check and change the content of the platform new account email template that will have been set up with your FlexMR Project Manager via the 'Edit Invitation Email' link:
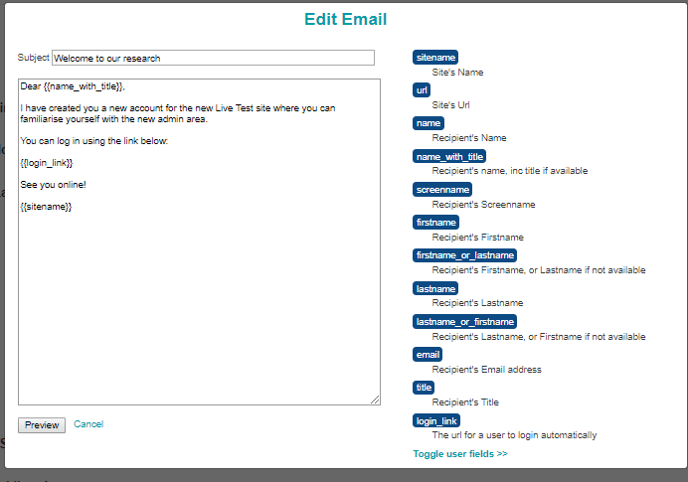
Any of the text in the {brackets} will automatically populate from the site and/or your CSV file.
If you make any changes, press 'Preview' and then if you are happy with how the content looks press save:
You are then ready to press 'Import Users & Create Accounts' - as soon as you press this, the users in the CSV file will have their accounts created and will be sent the new account email.
Checking the status of your upload
When your upload is in progress, you can check to see how many accounts have been created from the main CSV import page, if you have any failures you can download them via the 'Actions' drop down (correct the issues and then re-upload them again).