How to add randomised routes
In the survey build tab, under ‘branch logic’ you will see the ‘randomised routes’ option. If you do not see this, please contact the Client Support Desk team on support@flexmr.net
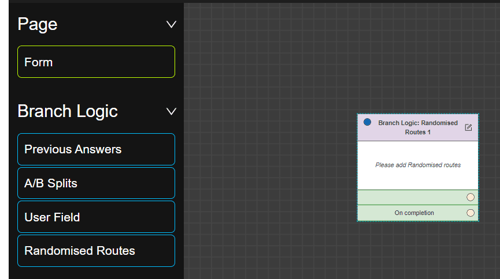
Click and drag the randomised routes branch logic onto the canvas directly.
Once added, click into edit this by clicking on the ‘edit’ icon in the top right-hand corner of the randomised routes node.
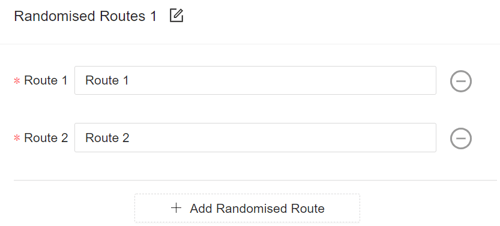
Here, you first need to select how many ‘routes’ you will have in total. To add a new randomised route, click on the ‘Add Randomised Route‘ button as shown in the screenshot below:
Tip: you can also re-name the routes by clicking into the box and typing this in. To remove a route, click on the minus symbol icon on the right.
Once your randomised routes node is added - you may then need to programme each of your routes (for example, you may have one or multiple forms for each of your routes e.g., concepts). But if you have already added these in, you can then move on to configure the randomisation and route connections.
Randomisation
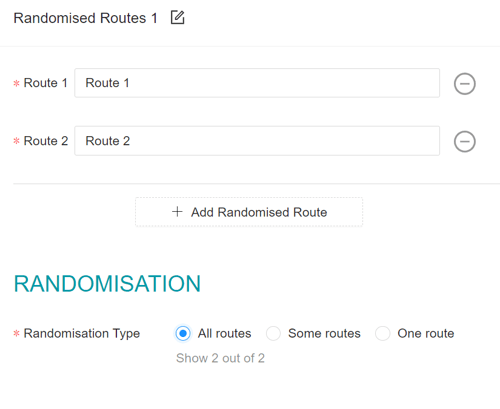
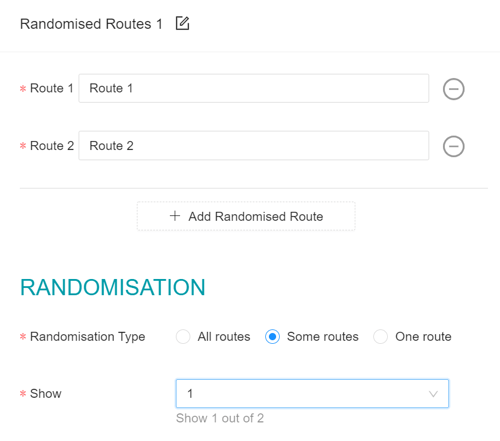
Next, you need to configure your randomisation. Click into edit the randomised routes node - and here you can choose from the following randomisation types:
- All routes
- Some routes
- One route
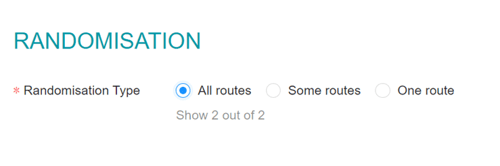
You will notice the number of routes that respondents will see comes up in grey text underneath the randomisation type selected. E.g., this example shows 2 different routes, where respondents will see ‘all routes’ so the message shown is ‘Show 2 out of 2’.
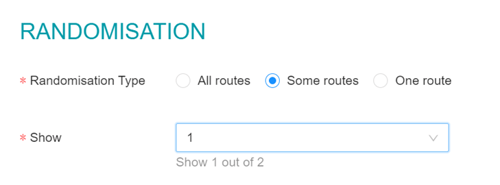
If you require respondents to only some routes, you would select the ‘some routes’ option. For example, if you have 4 different routes and you want respondents to see 2 out of the possible 4, you would select ‘some routes’ and select to show ‘2’.
If you require respondents to only see one single route, you would select ‘One route’. Respondents will be shown 1 single route at random.
Once selected the randomisation type, click ‘submit’.
Route connections
1. Once you have configured the routes and the randomisation, you then need to connect your in-ports to your out-ports.
2. To begin with, ensure that your randomised routes’ ‘in-port’ is connected to the previous form of questions in the survey. Next, start by connecting your first randomised routes’ ‘out-port’ to the form routes’ ‘in-port’. For example, in the screenshot below (the connection is highlighted in blue) the ‘Desert’ randomised route out-port is connected to the ‘Page: Desert questions’ in-port.
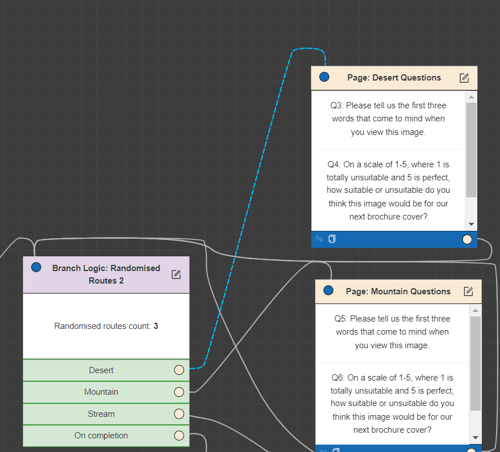
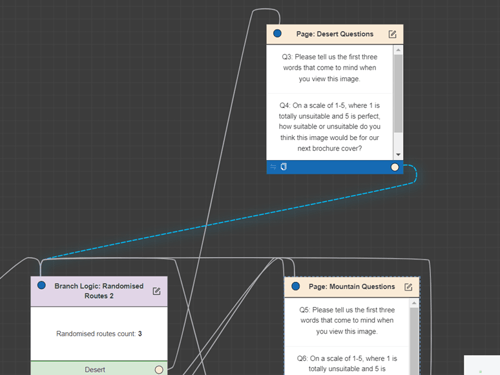
3. Following this, the first randomised route pages out-port then needs to connect back to the randomised route branch logic’s in-port. Again, please see this in the screenshot below (The connection is highlighted in blue)
4. From here, continue to connect each of your randomised route branch logic out-ports to the relevant route forms in-port, then the route forms out-port back to the randomised route branch logic’s in-port.
5. Finally, once each of your route forms are connected – you then need to connect the randomised routes’ branch logic ‘on completion’ out-port to your next form of questions in the survey ‘in-port. This is the form that everyone should then continue onto in the survey.
Please see below a screenshot of what the finalised randomised routes should look like: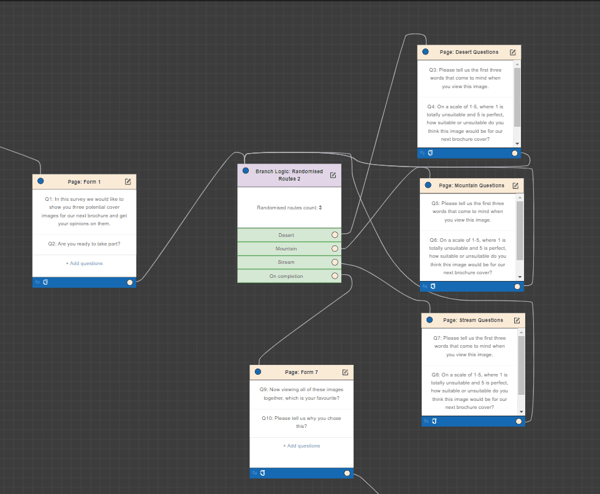
Having multiple forms per route
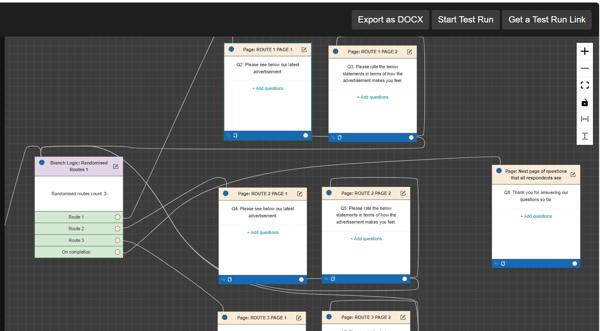
It is also possible to have multiple 'forms' (or pages) per route.
You just need to ensure that the final form in the route connects back to the randomised routes branch logic node.
Please see an example in the screenshot below:
If you have any questions at all, please get in touch with the Client Support Desk team on support@flexmr.net