During the running of a project, panel or community, you might need to add new, or update existing user field information to users, to do this you need to do a 'Data Append' via the CSV import page and then select 'Append User Data'.
Before you can update any data, you need to create a CSV file which contains the data you want to add/update in the user fields AND a field to match up the records of the users you are amending. To match up users you can use:
- System Unique ID
- Screen name
- Email address
In your CSV file, each piece of data should be added as a separate column and each row should represent a member. If you have pre-selected lists set-up as the Rule on any of your user fields that you are uploading data for, the data in the CSV file under these columns must match the values inputted into the user field values exactly (including capital letters, spaces etc.). Please note: if you have 'show on sign up page' (public field or private field) set-up as the rule on any of your user fields that you are uploading data for, the existing data set by the user will be overwritten.
To upload your file go to Back room > Database > CSV Imports

After having selected the 'Append User Data' option from the CSV upload page, you then need to browse to your file, and select either UTF8 or Latin1 as the upload type (Latin1 works better if there are characters which the system might not recognise, e.g. letters with accents etc.).
You then need to match up the fields in your CSV file with those in the platform, the fields in the drop downs are those in your excel file:
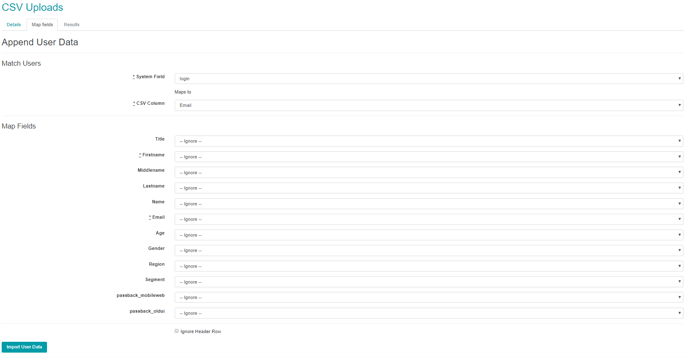
Match up all the relevant fields, if you have a user field but you do not have a field for this in your CSV file, you can leave the row on '-ignore-'.
If you have a header row on your CSV file (having one makes it a lot easier when matching up your data), you need to tick the 'ignore header row' box otherwise the platform will try to import this as a user (and you will end up with a failure).
Once you have matched up all the fields select 'Import User Data' and the append will start.
Checking the status of your append
When your append is in progress, you can check to see how many accounts have been updated from the main CSV import page, if you have any failures you can download them via the 'Actions' drop down (correct the issues and then re-append them again).