What kind of hardware is required to take part in an InterviewMR session?
To take part in an InterviewMR session, you will need:
- Access to a desktop or laptop
- Earphones or headphones, with a microphone
- A ‘webcam’ camera, which can be built into your device, or a separate piece of equipment that is plugged in
Will I need to have my camera, audio and microphone turned on to take part?
Within InterviewMR sessions, it is usually encouraged to have your camera, audio and microphone switched on, as this allows you to fully access and engage in the session. It is important that your microphone is working, so that you can share your questions, thoughts and insights.
How can I ensure my camera, audio and microphone are working and ensure they are turned on ready for the session?
It is beneficial for participants to carry out a ‘tech check’ on their equipment prior to any InterviewMR sessions, to ensure all hardware and access works as expected. This will help to prevent participant drop-out and delays in the running of the session.
In some cases, if agreed with participants on signing up to the session, the organiser or a FlexMR agent will reach out ahead of the session to carry out a ‘tech check’ with participants over the phone.
When joining an InterviewMR session, participants will need to allow access to their camera and microphone and ensure their audio settings are in place as required.
Enabling Camera, microphone and audio on joining an InterviewMR session
On joining an InterviewMR session, the options for enabling camera, microphone and audio may look a little different for each user depending which browser they are using.
You can find walkthrough instructions below for allowing the relevant access on widely used browser clients; Google Chrome, Microsoft Edge, and Firefox.
Google Chrome
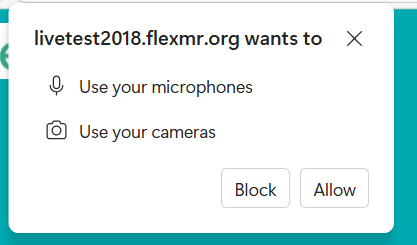
When joining the session, a query box will automatically open, to confirm if you would like to allow your camera and microphone.
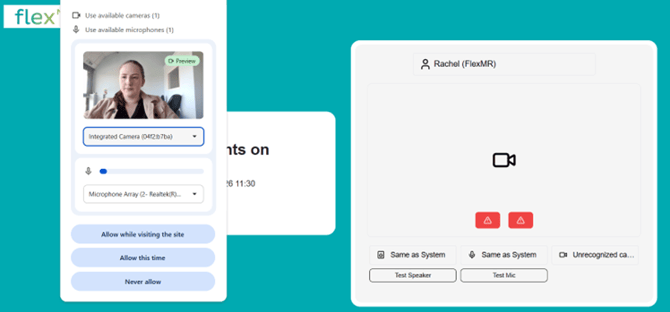
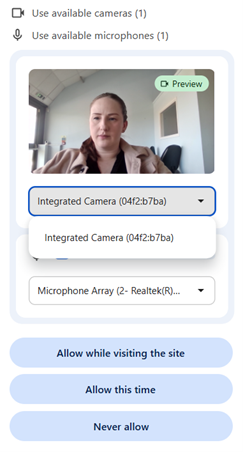
Before you allow the camera and microphone functions, you can select any available camera you would like to use:
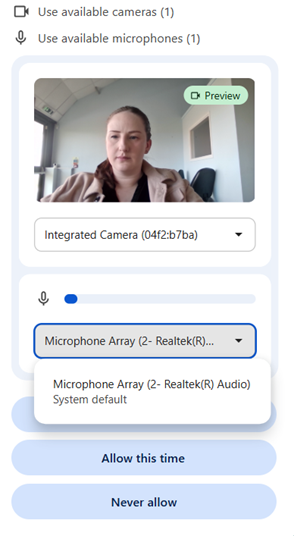
And any available microphone you would like to use:
Once you are happy with these settings, you can click ‘Allow while visiting this web site’ or ‘Allow this time’.
Once you have allowed these functions, you will see a notification to the left-hand side of the URL in your browser, confirming that your camera is in use:
![]()
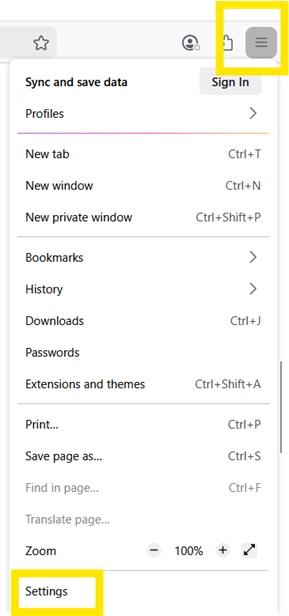
Top tip: If the permissions query box does not automatically open, check your browser settings for audio and video. You can access these settings by:
1. Clicking the 3 dots in the top-right of the browser page and clicking ‘Settings’
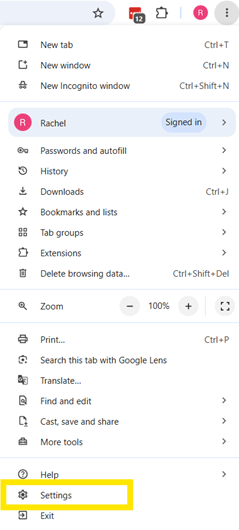
2. Click ‘Privacy and Security’ in the left-hand menu. You can then click into ‘Camera’ or ‘Microphone’ settings to configure permissions
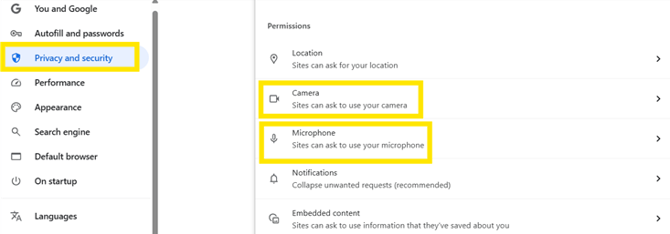
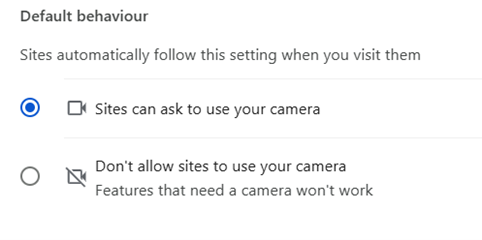
3. Within the relevant settings page, you can set the default behaviour for allowing or restricting sites from accessing your camera or microphone
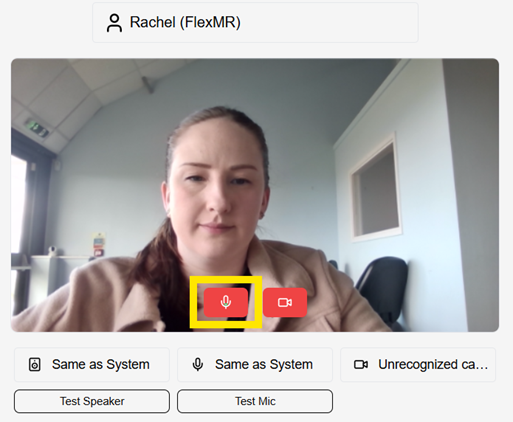
Within the InterviewMR session, you will have another opportunity to test your speaker function and microphone, using the ‘test’ options below:
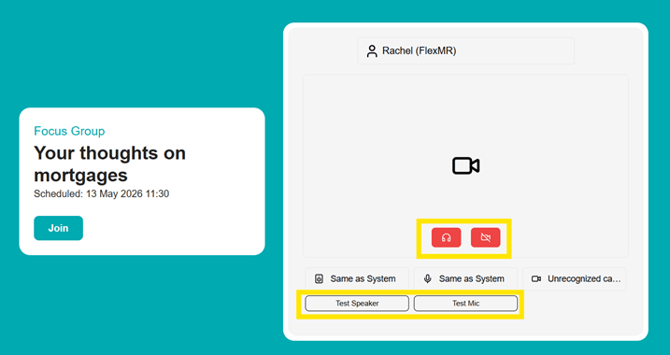
You can then click the red buttons to turn on your audio and video within the session to ensure you can be seen and heard. You can then toggle the microphone on or off throughout the session, as needed:
What is different on Microsoft Edge?
While the InterviewMR screen will appear the same on any browser, the permissions query box looks a little different in Microsoft Edge:
The browser settings are still accessed via an icon with 3 dots in the top-right corner, however, the camera and microphone settings can be found via ‘Privacy, search, and services’ > Site permissions > All permissions.
What is different on Firefox?
While the InterviewMR screen will appear the same on any browser, the permissions query box looks a little different in Firefox:
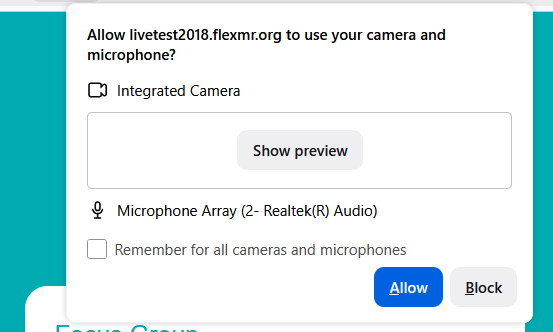
Within Firefox, you have the option to tick the ‘remember for all cameras and microphones’ option, to allow the browser to save your preferences.
As with other browser clients, the permissions section within the Firefox browser settings can be found within ‘Privacy and Security’. However, to access the settings menu, you will click an icon with 3 lines instead of 3 dots: